Colour
Back when I started using flash to shoot Roller Derby (in an attempt to get sharper blocker shots for GRG bout programme covers) I had huge colour balance problems.
A quick colour 101 for non-photographers. Colour is said to have a temperature, because it’s defined as the colour that would be produced if an ideal black-body radiator is heated to that temperature. Heat a piece of iron to 900 Celsius and it’ll glow red hot. Heat it to 5778 Kelvin (5504 C) and, assuming it hasn’t vaporised, it’ll glow the colour of the sun. 5778 K is really hot. Digital cameras expect daylight to be 6500 K. Confusingly, what we refer to as warmer light (more orange) is produced by cooler temperatures.
So the problem is that usually the hall lights are warmer (more orange) than the flashes, so the closer a skater is to a flash the colder (bluer) the light on her will appear. At worst, skaters close to a flash will be lit with more cold light, and at the same time skaters further from the flash will be lit with more warm light, so it’s impossible to get everything the same colour when editing. As well as making the editing much more complex this annoys me more than a little.
Now I know that most people probably wouldn’t notice as what they’re looking at is the gameplay in the image, but I’m a photographer. We worry about these things. And as anyone who had a good giggle and my reaction to them opening the Berlin Arena skylight in the middle of a game will tell you, I’m kinda picky about colour calibration.

The solution is to add colour correcting gel filters to the flashes, and these are readily available in different strengths – most commonly full CTO (convert to orange), ½ CTO and ¼ CTO. The problem is trying to figure out which filter, or combination of filters is needed for an unfamiliar hall. It’s difficult to eyeball this as your eye tends to compensate for the colour of the ambient light, and after a while you just stop seeing it. Then you look at a correctly balanced image on a camera screen and it looks too blue.
What I needed was a way to measure the colour temperature at a venue so that I don’t have to guess which gel to use, or work it out by trial and error. There are two solutions to this problem:

- Buy an expensive colour temperature meter (£900).
- Use an inexpensive grey card and a laptop. A grey card is a carefully manufactured reference sheet that is exactly 17% grey, with no colour cast. If you take a shot of this card lit by the room lights, the camera can automatically apply a colour correction to the shots you take to remove the colour cast.
Once you’ve done this the camera clearly knows what colour the room lights are (measured on the Kelvin scale), but it won’t tell you. Clearly nobody at Canon (or Nikon) thinks that this is useful information. So…

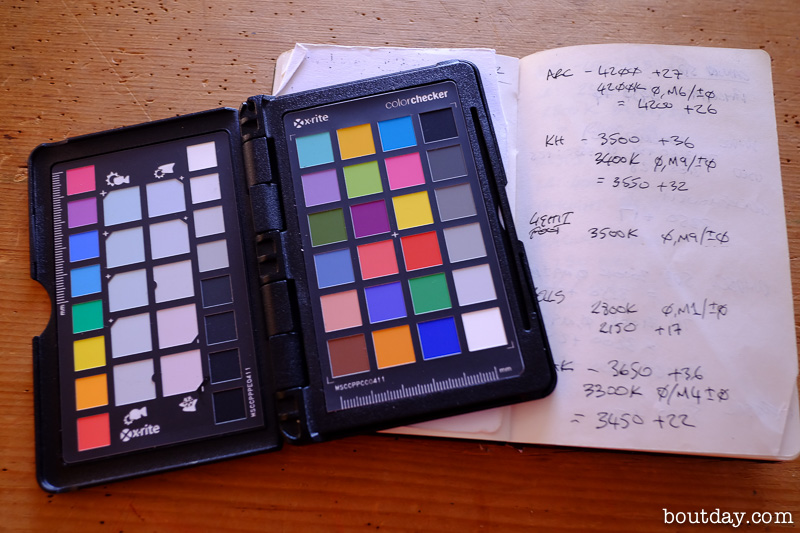
Calibrate your filters by taking a series of RAW shots of the grey card, flash lit with each gel and combination of gels that you’re going to use. Pull these into Lightroom and eyedropper them to correct the colour. Note the colour temperature and tint of each.
There doesn’t seem to be a linear relationship between filters and Kelvin value, that is, you can’t use 2 stacked CTO filters and get half the Kelvin value of one filter, so you have to measure all of them. These are the figures I got for my set of CTO gels, both temp and tint (Tint explanation added at the bottom):
| Gel Filter | Colour Temperature | Tint |
| Bare flash | 6750 | +6 |
| 1/4 CTO | 5100 | +6 |
| 1/2 CTO | 4250 | +5 |
| 1 CTO | 3400 | +11 |
| 1 + 1/4 | 2950 | +12 |
| 1 + 1/2 | 2750 | +16 |
| 2 x CTO | 2350 | +9 |
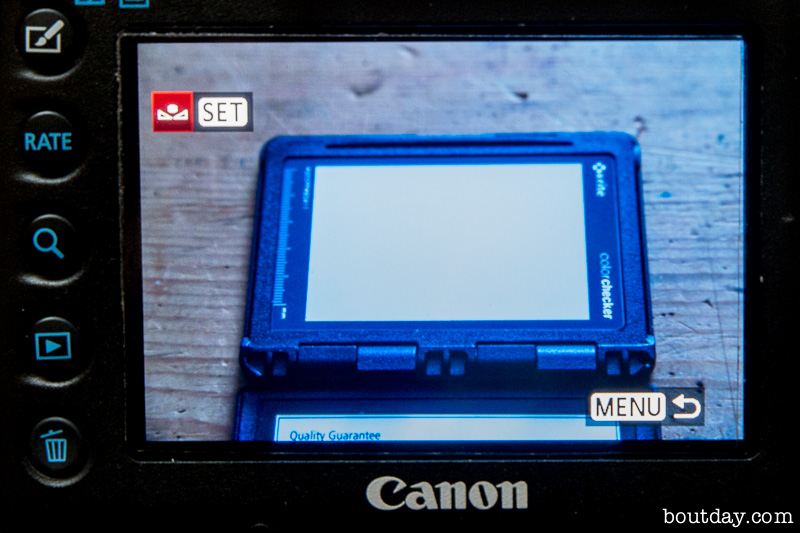
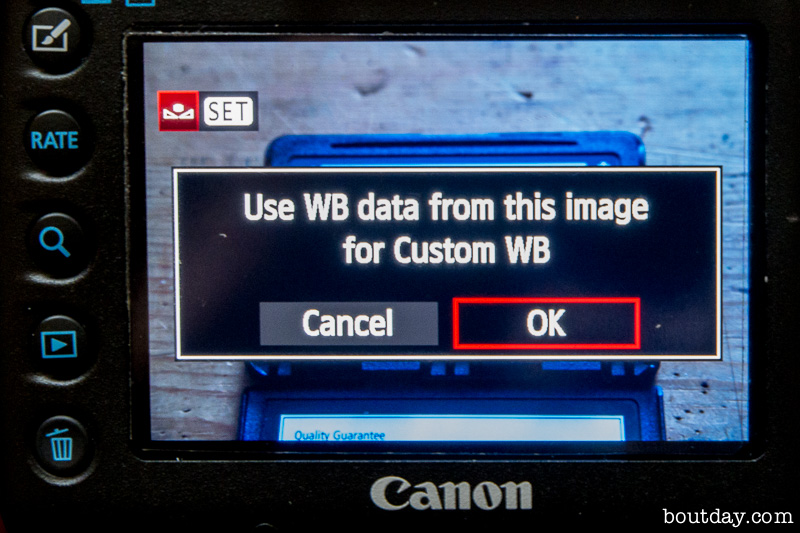
At the venue shoot the card under the ambient lighting and use that shot to set the camera’s custom white balance.
Use a low ISO as noise seems to make this less accurate. Shoot another general shot of the venue with this custom white balance setting. Again, user RAW as Lightroom won’t give you colour temperature information for a JPG.

Pull this custom balanced venue shot into Lightroom and look at the colour temperature and tint values. Pick the filter that is closest to these values. Temperature is more important than tint. This filter should correct your flashes for ambient conditions.
Work out the manual colour balance and tint settings necessary to replicate this measured camera setting and write them down. That way you can just set the balance manually on subsequent visits and don’t need to keep shooting grey card shots (and bringing a laptop with you). Colour space calculations are complex so it’s unlikely that your camera and Lightroom will come up with the same values.
For example, at the Glasgow Arc I measured 4200K +27 in Lightroom, and when I set 4200K +6 magenta in the camera I get 4200K +26 back in Lightroom.
However, I measured 3500K +36 in the Kelvin Hall, but had to set the camera to 3400K +9 magenta to get 3550K +32 back in Lightroom. Close enough.
So for the Arc I use a 1/2 CTO gel (measured at 4250 +5) and for the Kevin Hall I used a full CTO (measured at 3400 +11) and get, for me anyway, an acceptable match.
Or you could just guess and swear at Lightroom a lot later. 🙂
DaveMc, Feb 2015
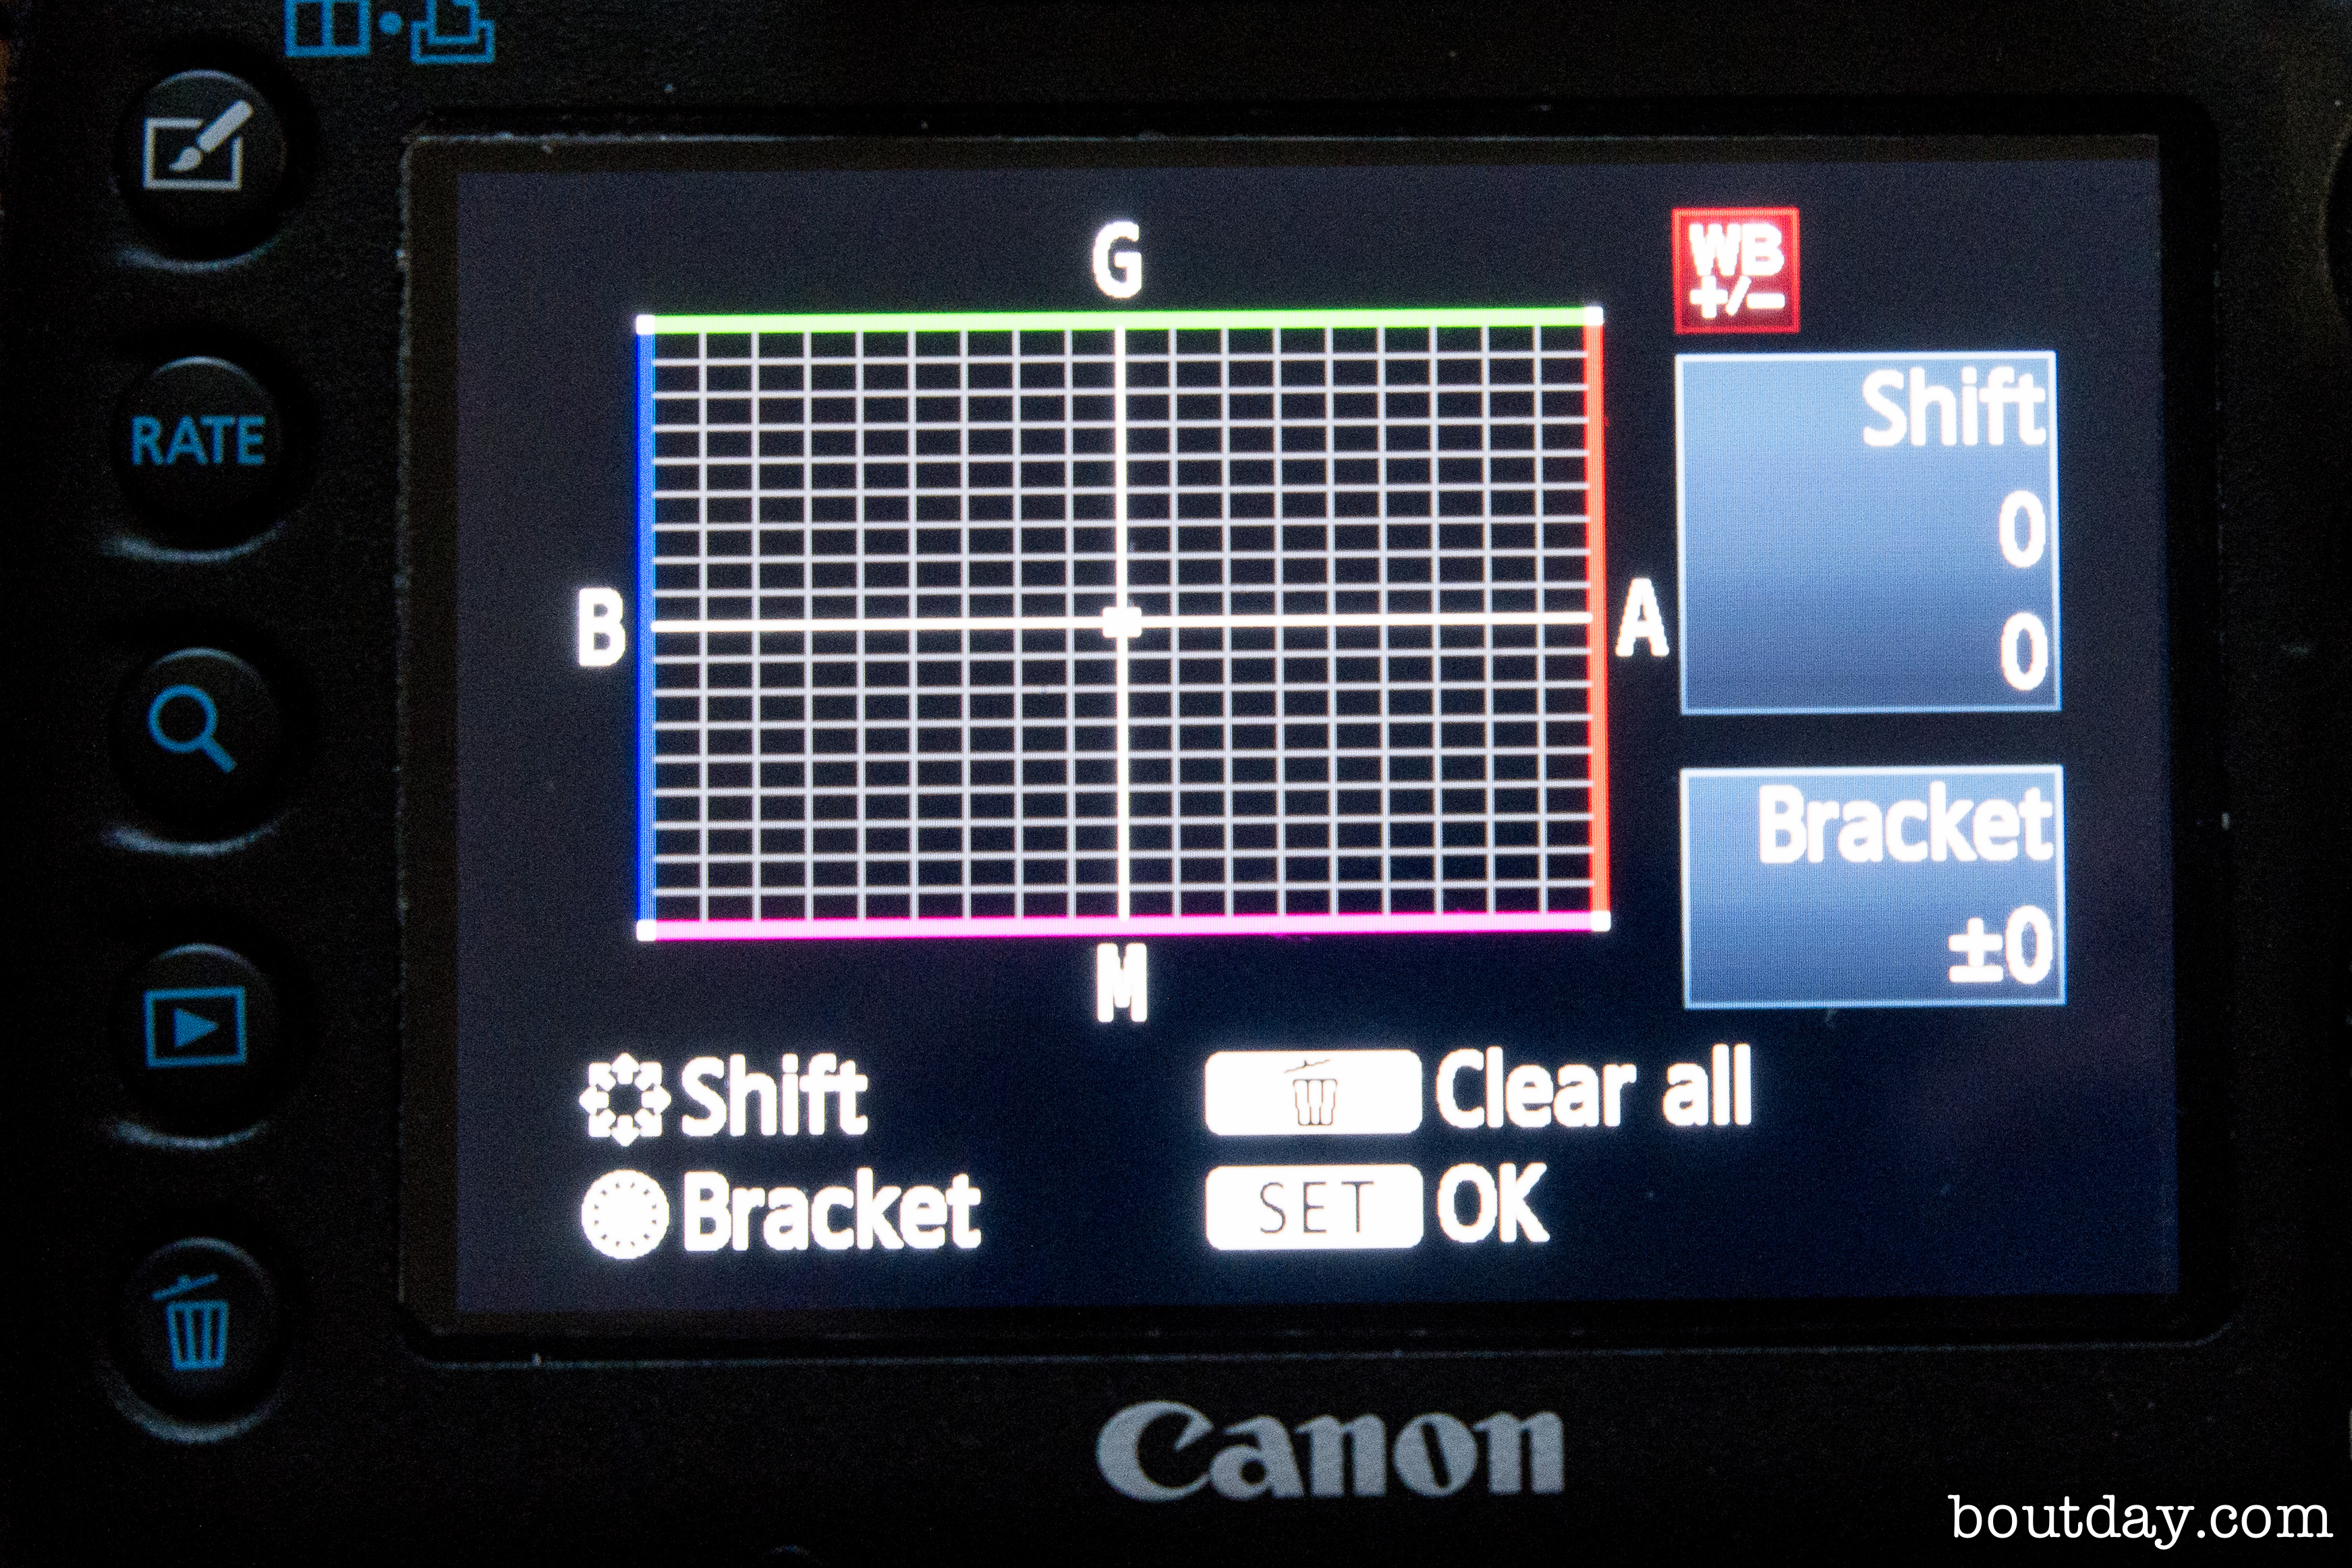
Any incandescent material, like our ideal black-body radiator or red hot chunk of iron, only varies between red and blue as you heat it up. Unfortunately for us there is another axis in this puzzle, between green and magenta. This shows up when dealing with fluorescent and gas discharge lights as a rather unpleasant green cast. You correct for it by adding some magenta. In Lightroom this is a tint value and on a Canon camera it’s a White Balance Shift – positive to add magenta and negative to add green.